May 17, 2017 / Kannan / 0 Comments
Following is a code snippet which show how to pass multiple parameters in JavaScript’s SetTimeout() function.
setTimeout(function () {
    CustomFunction(param1, param2, param3, param4, param5);
}, 1000);
May 17, 2017 / Kannan / 0 Comments
Following are some of the JSLink URL Tokens I have come across in SharePoint.
- ~site – reference to the current SharePoint site (or “Web”)
- ~sitecollection – reference to the current SharePoint site collection (or “Site”)
- ~layouts – version specific reference to the web application Layouts folder (so it will automatically swap out /_layouts/14 or /_layouts/15 for you)
- ~sitecollectionlayouts – reference to the layouts folder in the current site collection (e.g. /sites/team/_layouts/15)
- ~sitelayouts – reference to the layouts folder in the current site (e.g. /sites/teams/subsite/_layouts/15)
Few Examples:
~sitecollection/_catalogs/masterpage/
~site/siteassets/
~layouts/reputation.js
Source: https://www.martinhatch.com/2013/08/jslink-and-display-templates-part-1.html
May 16, 2017 / Kannan / 0 Comments
The following code shows how to refresh web part without refreshing page in SharePoint.
// Set Ajax refresh context
var eventAjax = {
    currentCtx: ctx,
    csrAjaxRefresh: true
};
// Initiate Ajax Refresh on the list
AJAXRefreshView(eventAjax, SP.UI.DialogResult.OK);
Source: https://pradiprathod.wordpress.com/2015/05/04/how-to-refresh-list-view-in-sharepoint-2013-using-javascript/
May 15, 2017 / Kannan / 0 Comments
To load multiple JavaScript files in SharePoint JSLink, insert a pipe symbol between multiple JavaScript file links in the JSLink field of webpart’s properties.
JSLink Field Example:
~sitecollection/SiteAssets/jquery.min.js|~site/SiteAssets/my-custom-file.js
A piple symbo is a “|” without quotes
Source: https://egilhansen.com/2013/03/11/jslink-the-simple-way-to-add-and-load-multiple-javascript-files/
May 11, 2017 / Kannan / 0 Comments
Following is the code which can be used to load JavaScript in sequence.
This code for example loads the reputation.js from SharePoint’s layouts folder & jQuery from site assets.
(function () {
    ExecuteOrDelayUntilScriptLoaded(function () {
        //sp.runtime.js has been loaded
        ExecuteOrDelayUntilScriptLoaded(function () {
            //sp.js has been loaded
            SP.SOD.registerSod('reputation.js', SP.Utilities.Utility.getLayoutsPageUrl('reputation.js'));
            SP.SOD.registerSod('jquery-3.2.1', '../SiteAssets/Scripts/jquery-3.2.1.min.js');
            SP.SOD.loadMultiple(['reputation.js', 'jquery-3.2.1'], function () {
                //reputation.js & jquery-3.2.1.min.js have been loaded.
                var context = SP.ClientContext.get_current();
                var web = context.get_web();
                //Check if jQuery has been loaded
                if (typeof jQuery != 'undefined') {
                    console.log("Jquery is loaded");
                }
                else {
                    console.log("Jquery is not loaded!");
                }
            });
        }, "sp.js");
    }, "sp.runtime.js");
})();
Source: https://sharepoint.stackexchange.com/questions/92082/uncaught-typeerror-cannot-read-property-get-current-of-undefined

May 5, 2017 / Kannan / 0 Comments
Recently I was trying to setup a development machine at our office and realized few issues.
- The machine didn’t have administrative privileges
- It was located behind the corporate proxy
- It uses Windows 10 as primary OS
So how to proceed? Following is what I did.
[Update: Now node.js includes npm, so I would suggest to download only node.]
Downloading Node.js & NPM
- Download the Node.js binary instead of installer from the below URLs
Node.js binary (32bit or 64 bit): https://nodejs.org/en/download/
Download NPM binary release from the url below
NPM Release: https://github.com/npm/npm/releases
- Extract Node.js to D:\Development\Node
Extract NPM to D:\Development\NPM
Set up environment
Every time the development environment is booted do the following
- Start a command prompt and set the following path
set PATH=%PATH%;D:\Development\Node;D:\Development\Node\node_modules\npm\bin;
- Check the Node version by typing the following
node -v
- Check the NPM version by typing the following
npm -v
If you get version numbers for both then both are working.
- Now set proxy so that NPM can download modules by running the following
set http_proxy=http://replace-with-your-organization-proxy-url:optional-port-number
set https_proxy=https://replace-with-your-organization-proxy-url:optional-port-number
npm config set strict-ssl false
npm config set proxy http://replace-with-your-organization-proxy-url:optional-port-number
npm config set https-proxy https://replace-with-your-organization-proxy-url:optional-port-number
Now the environment is set up.
Do remember, once the console is closed, all the above settings are lost and needs to be run again, just follow the section “Set up environment” again or do the following.
You can set up the “path” variable without administrator privileges in Windows by doing the following.
- From Windows’s Start Menu, open Control Panel.
- In Control Panel open “User Accounts”.
- In ‘User Accounts” open “Change my environment variables”.
- This will open the user’s “Environment Variables” window.
- Select the row with entry “Path”.
- Click “Edit” button.
- In the “Variable value:” text box, append the path of your executable location, which in this case is “D:\Development\Node;D:\Development\Node\node_modules\npm\bin;“
- Click OK
- Open a new terminal or console
- Type “node -v” to check if node is working fine.
- type “npm -v” to check if npm is working fine.
Source URLs:
http://abdelraoof.com/blog/2014/11/11/install-nodejs-without-admin-rights
http://www.kscodes.com/misc/how-to-set-path-in-windows-without-admin-rights/

May 5, 2017 / Kannan / 0 Comments
Following are the steps to be implemented in a 2013 workflow to set permissions for a SharePoint list item.
This particular method set the permissions for all users in a group with a particular role permission using REST Calls
1. Build Header Dictionary and set to a variable
Name: Accept
Type: String
Value: application/json;odata=verbose
Name: Content-Type
Type: String
Value: application/json;odata=verbose
1. Set “Group ID URL” to a variable
[%Workflow Context:Current Site URL%]_api/Web/SiteGroups/GetByName('Group Name')?$Select=id2. Set “Role ID URL” to a variable
[%Workflow Context:Current Site URL%]_api/Web/RoleDefinitions/GetByName('Role Name')?$Select=id
3. Set “Break Role Inheritance URL” to a variable
[%Workflow Context:Current Site URL%]_api/Web/Lists/GetByTitle('Library Name')/items([%Current Item:ID%])/BreakRoleInheritance(copyRoleAssignments=false, clearSubacopes=true)
4. Create Response Variables for “Group ID Response”, “Role ID Response”, “Response Headers” & “Response Code” with data type as Dictionary
5. Make GET REST call using Call Action to “Group ID URL” and assign output to above created variables in step 4
6. Use Get Action ‘d/Id’ from above “Group ID Response” variable and set it to a new variable “GroupID”
7. Make GET REST call using Call Action to “Role ID URL” and assign output to above created variables in step 4
8. Use Get Action ‘d/Id’ from above “Role ID Response” variable and set it to a new variable “RoleID”
9. Make POST REST call using Call Action to “Break Role Inheritance URL” and optionally assign output to above created variables in step 4
10. Set “Set Role URL” to a variable
[%Workflow Context:Current Site URL%]_api/Web/Lists/GetByTitle('Library Name')/items([%Current Item:ID%])/RoleAssignments/AddRoleAssignment(principalId=[%Variable:GroupID%],roleDefId=[%Variable:RoleID%])
Add Role:
AddRoleAssignment(principalId=[%Variable:GroupID%],roleDefId=[%Variable:RoleID%])
Remove Role:
RemoveRoleAssignment(principalId=[%Variable:GroupID%],roleDefId=[%Variable:RoleID%])
11. Make POST REST call using Call Action to “Set Role URL” and optionally assign output to above created variables in step 4
Reference URL: https://msdn.microsoft.com/en-us/library/office/dn531432.aspx
May 5, 2017 / Kannan / 0 Comments
When we fetch document details from the SharePoint, sometimes we may need to get the Author details as well. By default when we do ODATA REST query, we will get only Authorid with a number as a result.
To get Author’s additional details we may need to expand the selected item as show below.
https://server/sites/sitecollection/_api/web/Lists/GetByTitle('Documents')/Items?$select=Author/Title,Author/Name,Author/EMail,Author/MobilePhone,Author/SipAddress,Author/Department,Author/JobTitle,Author/FirstName,Author/LastName,Author/WorkPhone,Author/UserName,Author/Office,Author/ID,Author/Modified,Author/Created,*&$expand=AuthorFollowing list show all the valid Author fields
- Title
- Name
- EMail
- MobilePhone
- SipAddress
- Department
- JobTitle
- FirstName
- LastName
- WorkPhone
- UserName
- Office
- ID
- Modified
- Created
Source: https://social.technet.microsoft.com/wiki/contents/articles/31210.sharepoint-2013-get-user-details-from-person-or-group-field-using-rest-api.aspx
April 23, 2017 / Kannan / 0 Comments
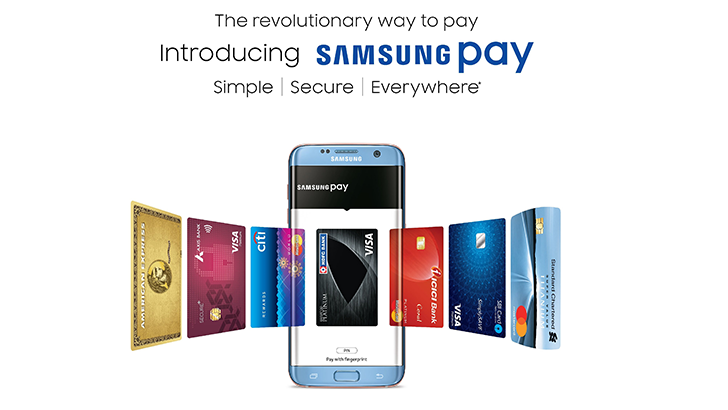
Samsung Pay is now available in India and I am delighted !

Pre March 2017…..
In India transactions at shops happen in three ways generally.
- Pay in cash
- Swipe your debit or credit card and pay
- Use digital wallets like Paytm
Issues one might face with cash is, unavailability of proper change or too much of cash in the wallet leading to larger wallets getting either pick pocketed or when most of the people keep it in their back pockets it has impact on your spinal cord.
With debit or credit cards, the magnetic strip wears off after repeated usage or lost. Replacement of cards are generally charged.
Using digital wallets requires an amount to be stored in their account and some times it’s an issue when some out lets don’t support them.
I pay mostly using digital mode until unless the total bill is less than ₹100.00
Following were some of the the issue which I faced.
- Wear and tear of debit card or the machine
- I leave my wallet at home
- QR code at shop is worn off and my banking app doesn’t recognize it
Especially after demonetization resulting in crash crunch, people started to use digital mode of payment more frequently which resulted in POS machines wearing off more frequently.
Post March 2017…..
Samsung launches Samsung Pay in India with almost all the Indian banks being supported.
Initially I was little hesitant, but then decided to try for one particular reason of it being supporting the magnetic readers based machine too as opposed to NFC only. Following is what I did,
- Update the Samsung Pay to latest
- Register my debit card and agreed for virtual card to be created
- Confirm addition of card via OTP
Now my mobile has a digital card added to it’s lock, home screen.
I went out for a purchase and when I was supposed to pay the bill the shop keeper requested me to handover the debit or credit card. I told him I will pay via mobile and he was little confused.
- So I got the POS Swipe machine from him
- Pressed the power button in my mobile to show the lock screen
- Swipe up the Samsung Pay app
- Choose the debit card
- Keep the mobile near the magnetic reader of the swipe machine
- Then payment was same as swiping the card
- Enter amount
- Enter pin
- Payment approved slip being printed out
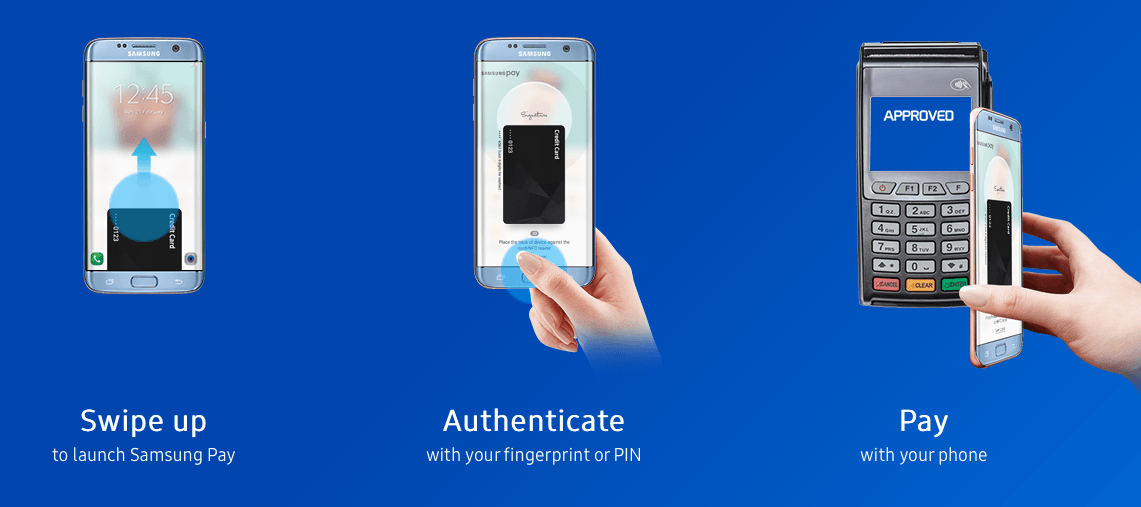
It was very easy.
Following are some of the advantages of Samsung Pay
- It supports both NFC based and magnetic based readers, hence more POS machines are supported
- Samsung’s KNOX (a secure storage space inside mobile) stores the information about the virtual card
- I guess Apple supports only NFC and hence less number of POS machines supported
- Also Apple and native Android has lower number of banking support in India
The interesting part is people around you are shocked to see such a payment system is available in India !
Copyright note: Image in the article belong to various other websites and copyright resides with them.
February 10, 2017 / Kannan / 1 Comment
Recently when I tried to add my SharePoint Online (Office 365) site in SharePoint Designer 2013, the login page would repeatedly give the error “the user id or password is incorrect”.
the user id or password is incorrect
I tried both with my domain account and onmicrosoft.com account and was making sure I chose “Work account” when prompted and still it didn’t work.
Then I realised that the multi factor authentication has been enabled recently.
Use “App Password” in SharePoint Designer login page when multi factor authentication is enabled.
So I created an app password and tried logging in and it worked.
The web based login page rendered within the designer’s doesn’t highlight or warn you if you are using multi factored authentication or app specific password
You can learn more about creating the app password here.