
May 5, 2017 / Kannan / 0 Comments
When we fetch document details from the SharePoint, sometimes we may need to get the Author details as well. By default when we do ODATA REST query, we will get only Authorid with a number as a result.
To get Author’s additional details we may need to expand the selected item as show below.
https://server/sites/sitecollection/_api/web/Lists/GetByTitle('Documents')/Items?$select=Author/Title,Author/Name,Author/EMail,Author/MobilePhone,Author/SipAddress,Author/Department,Author/JobTitle,Author/FirstName,Author/LastName,Author/WorkPhone,Author/UserName,Author/Office,Author/ID,Author/Modified,Author/Created,*&$expand=AuthorFollowing list show all the valid Author fields
- Title
- Name
- EMail
- MobilePhone
- SipAddress
- Department
- JobTitle
- FirstName
- LastName
- WorkPhone
- UserName
- Office
- ID
- Modified
- Created
Source: https://social.technet.microsoft.com/wiki/contents/articles/31210.sharepoint-2013-get-user-details-from-person-or-group-field-using-rest-api.aspx
January 30, 2017 / Kannan / 0 Comments
One of the consulting request I got was that an user should be able to sync files from a legacy system to O365 SharePoint Library. The issue was that the legacy system was old and all it could do was place a file in a particular folder.
The solution we could offer was the following.
- Configure a Windows mapped drive to point to a SharePoint library
- Configure the legacy system to place file into folder
This worked, but having a mapped drive was received as a security threat by the client’s security team.
But now thanks to the newly launched feature of syncing the SharePoint library files with OneDrive, this is easier.
Best part is, it supports both Windows & Mac.
Read more about it here
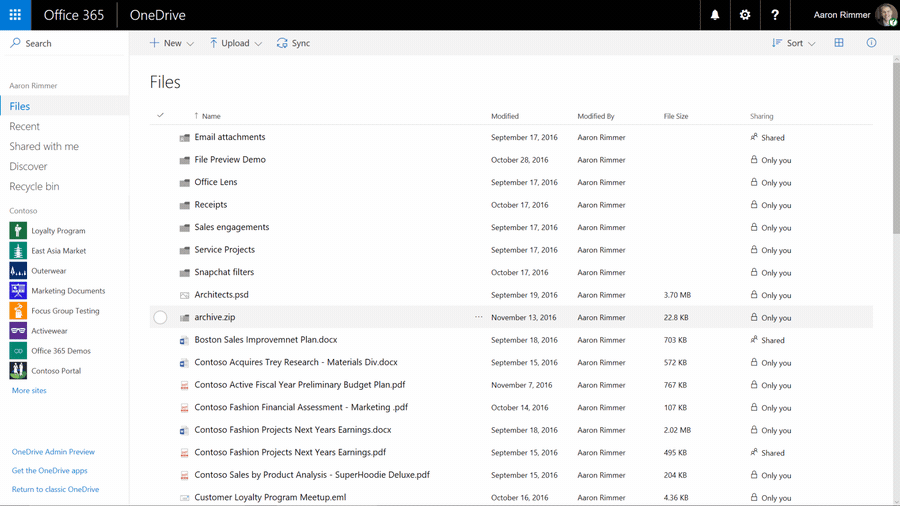
Image Source: Office Blog
March 10, 2016 / Kannan / 0 Comments
While working on designing display template for drop down based refiners in SharePoint Search there was a requirement to show counts along with refiners in refiners list.
Following is the change which I made in the refiner’s display template.
Actual code
<option value='_#= onChangeOrClick =#_'>_#= $htmlEncode(refinementName) =#_</option>
Updated Code
<option value='_#= onChangeOrClick =#_'>_#= $htmlEncode(refinementName) =#_ (_#= refinementCount =#_)</option>
March 8, 2016 / Kannan / 0 Comments
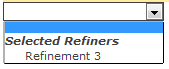
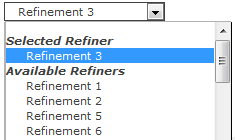
Recently one of the customer had a strange request where the customer wanted to Hide “Available Refiners” in SharePoint search refinement panel.
The “Available Refiners” is available in “Drop Down” type refinement panel.
When the refinement panel is being loaded, SharePoint executes a JavaScript function named AddPostRenderCallback. This would be available in the Refinement Display Template located under MasterPage/Search Gallery. The actual method looks like below code which is taken from O365.
AddPostRenderCallback(ctx, function() {
    if (hasAnyFiltertokens) {
        // Get the hidden block
        var hiddenOptions = document.getElementById(hiddenBlockID).children;
        var unSelGroup = document.getElementById(unselDD);
        var selGroup = document.getElementById(selDD);
        // Clone all the elements from the hidden list to the unselected option group
        for (var i = 0; i < hiddenOptions.length; i++) {
            var selectedElm = GetAllElementsWithAttribute(selGroup, 'value', hiddenOptions[i].getAttribute('value').replace('updateRefinersJSON', 'removeRefinementFiltersJSON'));
            if (selectedElm === null || selectedElm.length <= 0) {
                var cloneElm = hiddenOptions[i].cloneNode(true);
                unSelGroup.appendChild(cloneElm);
            }
        }
    }
});
To the above original code I made a small change so that “Clone all the elements” code executes only when user has selected a refiner.
// Clone all the elements from the hidden list to the unselected option group
if(selectedFilters.length <= 0)
{
	for (var i = 0; i < hiddenOptions.length; i++) {
		var selectedElm = GetAllElementsWithAttribute(selGroup, 'value', hiddenOptions[i].getAttribute('value').replace('updateRefinersJSON', 'removeRefinementFiltersJSON'));
		if (selectedElm === null || selectedElm.length <= 0) {
			var cloneElm = hiddenOptions[i].cloneNode(true);
			unSelGroup.appendChild(cloneElm);
		}
	}
}
To the above orignal code I added the following code to hide the “Available Refiners” option.
if(selectedFilters.length > 0)
{
	if(unSelGroup!=null)
	{
		unSelGroup.style.display = 'none';
	}
}
The above code will hide the “unSelGroup”‘s “Option Group” HTML to hide the Options for “Available Refiners”.
Final code would look like below.
AddPostRenderCallback(ctx, function() {
    if (hasAnyFiltertokens) {
        // Get the hidden block
        var hiddenOptions = document.getElementById(hiddenBlockID).children;
        var unSelGroup = document.getElementById(unselDD);
        var selGroup = document.getElementById(selDD);
        // Clone all the elements from the hidden list to the unselected option group
        if(selectedFilters.length <= 0)
        {
            for (var i = 0; i < hiddenOptions.length; i++) {
                var selectedElm = GetAllElementsWithAttribute(selGroup, 'value', hiddenOptions[i].getAttribute('value').replace('updateRefinersJSON', 'removeRefinementFiltersJSON'));
                if (selectedElm === null || selectedElm.length <= 0) {
                    var cloneElm = hiddenOptions[i].cloneNode(true);
                    unSelGroup.appendChild(cloneElm);
                }
            }
        }
        //Added for Gold Asset requirement where once a refiner is selected the "Avaialble Refiners" item should be made hidden
        if(selectedFilters.length > 0)
        {
            if(unSelGroup!=null)
            {
                unSelGroup.style.display = 'none';
            }
        }

        var refinerUpArrow = document.getElementById('refinerExpandCollapseArrow');
        if(refinerUpArrow!=null)
        {
            refinerUpArrow.style.display = 'none';
        }

    }
});
End Result is following

March 7, 2016 / Kannan / 0 Comments
Recently I had a requirement for OOTB search Box + Result where the customer wanted to clear the search results regardless of any refinement selected or not.

To implement this, in the display template HTML the following was added.
Do note that if refinements are there, the commented single line of code didn’t work and I had to replace the entire # as blank. Do check the original source (mentioned below) for more information.
<!--#_
    clearSearchResults = function()
    {
        var hash = window.location.hash;
        if( hash.indexOf('Default') == 1 ) {
            hash = unescape(hash);
            var kIdx = hash.indexOf('"k":');
            var rIdx = hash.indexOf('","');
            var query = hash.substring(kIdx+5,rIdx);
            query = query.replace(/\\/g, '');
            //window.location.href = window.location.pathname + window.location.search + '#k=' + escape(query);
            window.location.href = window.location.pathname + window.location.search + '#';
        } else {
            window.location.href = window.location.pathname + window.location.search + "#";
        }
    }
_#-->
<div id="ClearSearch" class="ms-alignCenter">
    <h2><a onclick="clearSearchResults();"  style="cursor:pointer">Clear/Reset All</a></h2>
</div>
The source for the above code is Add a “Clear Filters” link to your search page in SharePoint 2013
December 17, 2015 / Kannan / 0 Comments
When we add the sp.js link to the SharePoint Webpart Page or simple ASPX Page and when the page loads we get the following error.
script5009 ‘type’ is undefined sp.js
The solution I saw in the web for this is, add Micrsofot Ajax script.
<script type="text/javascript" src="//ajax.aspnetcdn.com/ajax/4.0/1/MicrosoftAjax.js"></script>
Do note that this resolves the similar error which occurs when we add other SharePoint js files as well.
August 24, 2015 / Kannan / 1 Comment
Following is the JSOM code which will help in getting single or multiple items from a SharePoint’s People Picker Field.
function GetPeoplePickerFieldValue(currentListItem, internalFieldName) {
    if (currentListItem.get_item(internalFieldName) !== 'undefined' && currentListItem.get_item(internalFieldName) !== null) {
        if (currentListItem.get_item(internalFieldName).length > 0) {
            var _user = "";
            //If field has only one item
            if (currentListItem.get_item(internalFieldName).length == 1) {
                _user = currentListItem.get_item(internalFieldName)[0].get_lookupValue();
                if (_user == null)
                    _user = "";
            }
            //If field has multiple item
            if (currentListItem.get_item(internalFieldName).length > 1) {
                for (var i = 0; i < currentListItem.get_item(internalFieldName).length; i++) {
                    //Append all User names with a semi colon separator
                    _user = _user + currentListItem.get_item(internalFieldName)[i].get_lookupValue() + "; ";
                }
                _user.trim;
                if (_user == null)
                    _user = "";
            }
        }
        return _user;
    }
}
Source: Microsoft TechNet Forum
October 19, 2014 / Kannan / 0 Comments
The following is the table which has list of SharePoint object models with components and their respective namespaces based on the object model.
This is applicable for both SharePoint 2010 & SharePoint 2013 Foundation & Enterprise editions respectively.

Click here to view the table in printable format
July 11, 2014 / Kannan / 0 Comments
With the following Windows PowerShell Command, a managed account can be provided access to a content database.
$w = Get-SPWebApplication -identity http://<WebApplication>
$w.GrantAccessToProcessIdentity("<Domain>\<Username>")
Note: Before running this command, the account should be registered as managed account
To register a managed account
- On the SharePoint Central Administration website home page, in the left navigation, click Security.
- On the Security page, under General Security, click Configure managed accounts.
- On the Managed Accounts page, click Register Managed Account.
- Type the user name and password of the domain account that you are registering.
- Optionally, select the Enable automatic password change check box if you want SharePoint Server to manage password changes for this account.
- Click OK.
March 25, 2014 / Kannan / 0 Comments

SharePoint & Windows
A post describing SharePoint’s high resource usage and how Windows 8’s Boot to VHD will help to run SharePoint host with more dedicated resource.
Trailer….
For people like me who has to depend on resource hungry SharePoint servers, life is difficult as a developer and IT designer.
Most of the time we have to run the server inside a virtual environment and most of the time it would be a standalone server.
The problem….
Initially with SharePoint 2010 you could get away with at-least 6GB RAM allocated to a guest OS. But with SharePoint 2013 you require at least 12GB for a better experience and most of the machines come with 8GB or 16 GB RAM.
The problem is, your host OS will take at least 2GB RAM which for SharePoint can make life and death kind of experience even though Windows is perfectly capable of keeping SharePoint alive with paging (Virtual RAM) and have the storage drive on a never ending marathon run !
For virtual environment, the following are the options we generally have.
- Microsoft Virtual PC (Free)
- VMWare Workstation (Costly)
- Oracle Virtualbox (Free)
- Windows Server 2008/2012 R2’s Hyper-V (Super Costly)
Out of these, VirtualPC and Hyper-V natively use VHD container format for guest OS. Others too have these (Thanks to Microsoft’s Open Specification Promise) but mostly they use proprietary format.
When Windows 7 was rolled out, the Enterprise & Ultimate editions had the native Boot-to-VHD support.
What is Boot To VHD ?
Refers to the ability of a physical computer to mount and boot from an operating system contained within a VHD – (PS: Shamelessly copied the text from wikipedia)
Again to the problem….
Consider a scenario where you own a VM host system with 8GB RAM and run a VM guest with 6GB RAM for SharePoint 2010. This worked mostly fine. Then comes the SharePoint 2013 which requires even more ram, at-least 2GB in addition. Now you are in soup, you can wait forever to see the guest OS, aka Windows Server 2008 R2 or Windows Server 2012’s desktop to show up!
Solution….
Gain as much RAM as possible from host or upgrade the system to have more RAM. You will be in luck for desktop systems. Laptops, you are mostly in trouble.
Windows 7…..
Luckily with Windows 7(Enterprise/Ultimate) you could boot physical computer to a VHD and utilize all the resources. That’s good news, now you have all the RAM available for the SharePoint. The bad news is Enterprise is available for volume licensing only and Ultimate prohibitively costly.
Windows 8…..(forget Windows 8 RT, that thing can’t even run a standalone app!, but still a good OS for daily basic usage, so Microsoft is forgiven!)
Then comes Windows 8 with even more simpler editions. A regular version, professional version & an enterprise version. Compared to Windows 7, Windows 8 Pro is affordable and can be bought by an individual.
The best news is, Windows 8 Pro comes with Client Hyper-V and supports Boot To VHD.
So now as an indie SharePoint developer, you have a host OS which can be bought, has a virtualization capability and supports Boot To VHD.
Assuming you bought the host OS, i.e. Windows 8 Pro, its time to utilize it for better SharePoint development experience.
PS: I am going to explain only Boot-to-VHD part. Enabling Hyper-V in Window 8 Pro or installing SharePoint are out of scope for this post. Get help from trusted friend Google’s Search or Microsoft’s Bing.
After a long story…Main Picture…..
Enabling boot-to-VHD…..
- Create a VM Guest using Hyper-V and make a note of the location where the VHD file is located.
- In VM Host, go to Control Panel, Administrative Tools, Computer Management. Go to Disk Management under Storage.


- In Action menu, click Attach VHD. Now you should have a volume with drive letter. Make a note of the drive letter. In this case it’s D:\


- Now launch a command prompt as administrator.
- Take a backup of current boot information by using the following command
bcdedit /export C:\bcdcurrentbackup

- Now let’s add the VHD’s Windows to boot by using the following command (The drive letter we noted will be used here)
bcdboot D:\Windows

- Reboot the machine and you should be able to see the multi boot screen.

- Choose the SharePoint’s guest OS to boot.
You can use bcdedit command to rename the description of the Windows in multi boot screen.
Removing boot-to-VHD…
- Open command prompt in admin mode
- As mentioned in point 5 above take a backup of the boot system file
- View list of current boot entries by typing the following
bcdedit


- Make a note of the guid in the entries. In this case it’s {4ff0aa40-b17f-11e3-beaa-bc5ff4cf029e}
- Delete the entry by typing the following command
bcdedit /delete {4ff0aa40-b17f-11e3-beaa-bc5ff4cf029e} 


